CPU
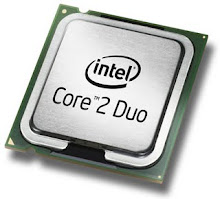
An example of a CPU socket, Socket AAs installation of the different makes of CPU can differ between brands, it is generally safer torefer to the manufacturer's instructions, that are provided with the CPU. If you are using athermal paste with your CPU, follow the directions that came with them for details on how toapply it.The two things that go wrong the most often and most expensively (minimum of a killed32CPU, sometimes more) in building one's own computer are both related to the CPU and itscooler:1. Switching the computer on "just to see if it works" before adding any CPU cooling unit.Without cooling, CPUs heat up at extreme rates (a CPU heats up anywhere between ten timesand a thousand times as fast as a cooking area on your stove!) By the time you will get the firstdisplay on the screen, your CPU will already be severely overheating and might be damagedbeyond repair.2. Mounting the CPU cooler improperly. Read the instructions that came with your CPUand cooler very carefully and ensure you are using all components in the correct order andcorrect place.Make sure you get a cooler that is compatible with the CPU you have. Most brands come withmultiple mounting brackets that will suit all different chipsets, but it's best to check forcompatibility just in case.If using thermal paste, apply it only to the CPU die (the square piece of silicon in the middle ofthe CPU) and do so sparingly -- most modern CPUs take no more than a grain of rice sized dabof thermal paste. Some people do like to wipe some onto the heatsink's surface and then wipe itsmoothly off so that bits of it may get into tiny holes for better heat transfer. See Arctic SilverInstructions for more info on how to apply and remove thermal paste/grease. (It was written tobe specifically for Arctic Silver paste, but the same techniques can be applied to other brandsof thermal paste.)If using a thermal pad supplied with your cooler, make sure you remove any protective tapejust before installing and do not get it dirty - and do not combine thermal pads with thermalpaste, it's either one or the other. Then, check that you install the cooler in the right orientationand that you set it flat on the CPU die without exerting undue pressure on any edges or corners- the latter can make small pieces of the die break off, killing the CPU.One option you may consider, before installing the heatsink, is to "lap" the heatsink, whichmeans to smooth out the bottom surface. To do this, start by sanding in smooth circular motionswith a coarse grain sandpaper to smooth out the worst of the uneveness, then, as it starts to getsmoother, switch to a finer grained sandpaper (the numbers go up as the sandpaper is finer, sosomething such as 60 is coarse while 220 will be very fine.) If you get it right, it should have asurface which feels completely smooth to the touch where you can almost see a reflection in it.Some companies producing heatsinks lap the surface themselves and this will be unnecessary,but, it is very rare. A lapped heatsink is far more effective due to having better contact with thechip.Tighten the cooler using only the specified holding devices - if you did everything right, theywill fit. If they don't fit, check your setup - most likely something is wrong. After mounting thecooler, connect any power cables for the fan that is attached onto the cooler. Then, ifeverything is seated tightly and firmly, you can safely run your first test, making sure the CPUfan does run (you have a few seconds of safety margin here, but if the fan is not running, switchoff the system and check your cabling quickly.)33As an aside to the instructions above, it has been my personal experience that fitting the CPUand heat sink is best done on a supportive surface (a telephone directory on a table in my case)prior to installation, to avoid excessive flexing of the motherboard.
